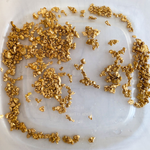

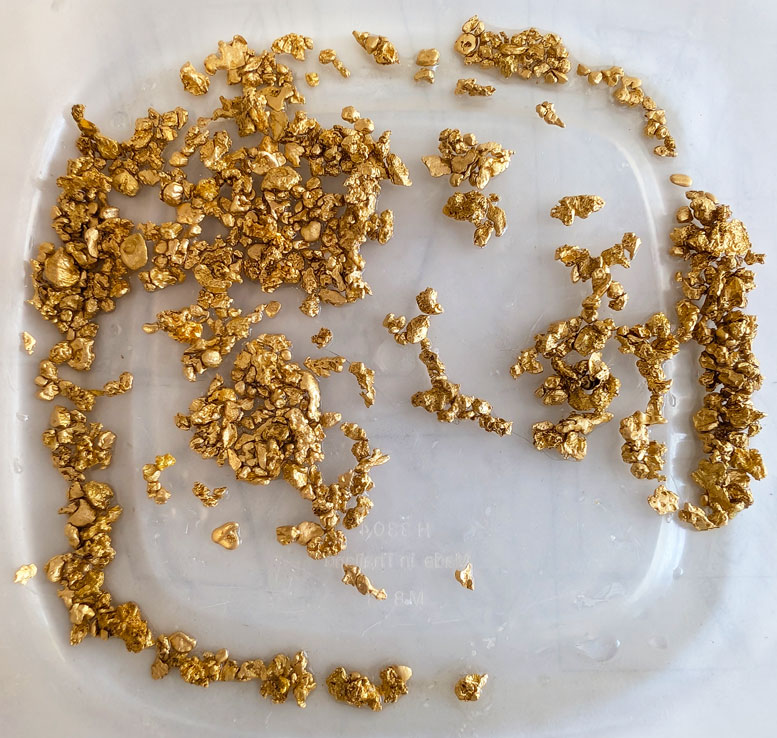
Finding gold nuggets while prospecting is exciting, but cleaning them properly requires patience and care. Small nuggets often contain fine gold particles, tiny flakes, and loose sediment that can easily be washed away if the wrong technique is used. Whether you collect gold as a hobby or regularly pan for it, learning safe cleaning methods helps preserve your valuable finds.
The best approach is to remove dirt gradually while keeping the nuggets and surrounding material under control. Using suitable equipment, such as a shallow pan, a soft brush, and a container for collecting rinse water, makes the process easier. Resources such as goldplaypots can also be useful when exploring gold prospecting equipment and techniques for handling recovered gold.
Why Careful Cleaning Matters
Gold is relatively soft compared with many common minerals, and small gold particles can be difficult to distinguish from sand, black sand, and other heavy materials. Although solid gold nuggets are dense and usually remain at the bottom of a container, tiny flakes and loose particles can move with flowing water.
Aggressive washing can scatter these particles, while rough brushing may damage delicate specimens or remove interesting mineral details from their surfaces.
Careful cleaning serves three main purposes:
- Removes mud, clay, and loose sediment.
- Preserves small gold flakes and fine particles.
- Maintains the natural shape and appearance of gold nuggets.
The goal is not necessarily to make every nugget shine. In many cases, gentle cleaning that preserves its natural surface is better than trying to achieve a polished appearance.
Gather the Right Equipment Before You Start
Preparing a suitable workspace is one of the easiest ways to prevent accidental gold loss. You do not need expensive equipment for basic cleaning, but you should use tools that allow you to control water and sediment.
1. A gold pan or shallow container
A plastic gold pan is useful because its sloped sides help separate heavier material from lighter sediment. For cleaning small nuggets, a shallow plastic tray can also work well.
Choose a container with enough room to move the material without spilling it. Avoid using a deep sink or washing directly under a strong tap, especially when handling very fine gold.
2. A soft brush
A small, soft-bristled brush helps loosen dried mud from nugget surfaces. A clean artist’s brush or a soft detailing brush can work well.
Avoid stiff wire brushes, abrasive pads, and tools that could scratch delicate specimens or force fine particles away from the main material.
3. A spray bottle or gentle water source
A spray bottle provides better control than a running tap. It allows you to direct small amounts of water onto the material without creating a strong current.
Clean water is usually sufficient for removing loose dirt. If your water supply contains visible sediment, use clean bottled or filtered water instead.
4. A recovery container
Place a second container beneath or beside your cleaning tray to collect rinse water. Any sediment washed from the nuggets can settle in this container, allowing you to inspect it before disposal.
This simple precaution is particularly valuable when working with small flakes or gold-bearing concentrates.
Step-by-Step Guide to Cleaning Gold Nuggets
Following a gradual process makes it easier to remove unwanted material without losing small particles.
Step 1: Inspect the nuggets before washing
Spread the recovered material across a clean, light-colored tray. Examine each piece carefully under good lighting.
Look for visible gold flakes, tiny attached particles, cracks, and areas covered by clay. Some specimens may contain gold mixed with quartz or other minerals.
Do not immediately separate every small particle from the main specimen. Material that appears to be ordinary sediment may contain additional gold, so keep uncertain pieces until you can inspect them more closely.
Step 2: Remove loose dirt by hand
Start by removing larger pieces of gravel and loose debris using your fingers or plastic tweezers.
Work over the tray rather than directly over a sink. This helps catch anything that falls from the nugget during handling.
Avoid squeezing, scraping, or repeatedly rubbing small specimens. If a particle is attached firmly to the nugget, leave it in place until you determine whether it is simply dirt or part of the specimen.
Step 3: Rinse with a small amount of water
Place the nugget or gold-bearing material inside the shallow pan. Add a little water using a spray bottle or another gentle water source.
Move the pan slowly so that loose dirt begins to separate. Do not tilt it sharply or pour water out rapidly.
If the material contains fine flakes, keep the water level controlled and avoid creating a strong current. Let heavier particles settle before moving the container again.
Step 4: Loosen stubborn clay gently
Clay can cling tightly to gold and make small nuggets appear larger or darker than they really are.
Allow the material to soak in clean water for several minutes. Depending on how compacted the clay is, a longer soak may be helpful.
Once the clay softens, gently brush the surface with a soft-bristled brush. Use light strokes and rinse periodically to check your progress.
Do not use needles, knives, or metal picks to force material out of narrow gaps. These tools can scratch the specimen or dislodge small particles unexpectedly.
Step 5: Recover sediment from the rinse water
This is one of the most important steps when cleaning gold-bearing material.
Instead of pouring dirty water directly down the drain, transfer or drain it into a separate recovery container. Allow the sediment to settle before examining the contents.
Gold is dense, but very fine flakes can still be carried by moving water, particularly when they are mixed with other particles or trapped in floating debris.
Once the sediment settles, carefully decant only the clearer water from the top, leaving the heavier material at the bottom. If you are uncertain whether the remaining sediment contains gold, retain it for further panning.
Step 6: Perform a final gentle rinse
After removing most of the dirt, rinse the nuggets with a small amount of clean water.
Inspect each piece from different angles. If visible clay remains, repeat the soaking and gentle brushing process instead of increasing the water pressure.
For specimens with intricate surfaces, some dirt may be difficult to remove without disturbing attached material. In such cases, leaving a small amount of residue is preferable to losing a valuable particle.
Step 7: Dry and store the nuggets
Place cleaned nuggets on a soft, lint-free cloth or another clean surface. Allow them to air-dry naturally.
Avoid using excessive heat, as it is unnecessary for ordinary gold nuggets and may affect attached minerals or other materials in composite specimens.
Once dry, store the nuggets in individual small containers or padded compartments. Keeping specimens separate reduces the chance of scratching, mixing, or accidentally losing the smallest pieces.
Common Mistakes That Cause Gold Loss
Even experienced prospectors can lose fine gold when cleaning too quickly. Understanding the most common mistakes helps prevent unnecessary losses.
Using too much water pressure
A strong stream can scatter tiny flakes across the workspace or carry them out of the pan. Use a spray bottle or gentle flow instead.
Cleaning directly over a drain
Fine gold can disappear into plumbing if it is washed away with dirty water. Always work over a tray and collect rinse water when handling gold-bearing concentrates.
Discarding sediment too early
Material that looks like ordinary sand or mud may contain fine gold. Inspect the sediment before deciding whether it can be discarded.
Scrubbing with abrasive tools
Rough brushes and metal tools can damage delicate specimens or disturb gold attached to softer minerals. Begin with the gentlest method and increase the effort only when necessary.
Using chemicals unnecessarily
Many gold nuggets can be cleaned with water and a soft brush. Household cleaners, acids, bleach, and other chemicals are not appropriate default choices because they can create safety hazards or damage associated minerals.
Should You Use Chemicals to Clean Gold Nuggets?
For most naturally recovered nuggets, water and gentle mechanical cleaning are sufficient. Chemicals should not be used simply to make gold look brighter.
Gold is chemically resistant under many ordinary conditions, but minerals attached to a nugget may react differently. Some chemical treatments can also release hazardous fumes, cause burns, or create dangerous reactions when mixed.
If a specimen contains stubborn mineral deposits that cannot be removed safely with water, consider consulting an experienced mineral collector or professional specimen cleaner before attempting chemical treatment.
The U.S. Geological Survey provides educational information about gold and its occurrence in nature through its mineral resources materials. Understanding the properties of gold and the minerals found alongside it can help prospectors make better decisions about handling and preserving their finds. For further background, consult the U.S. Geological Survey.
Tips for Preserving Very Fine Gold Particles
Fine gold requires more attention than larger nuggets because its small size makes it easier to lose during rinsing and handling.
Use the following precautions:
- Work in small batches: Smaller quantities are easier to inspect and control.
- Choose a contrasting tray: A light or dark tray, depending on the gold and sediment, can make tiny particles easier to spot.
- Keep tools clean: Gold flakes can remain stuck to wet brushes, tray corners, and container walls.
- Inspect the entire workspace: Check the tray, brush, and recovery container before finishing.
- Save uncertain material: Keep questionable sediment until you can determine whether it contains recoverable gold.
- Avoid rushing: Allow sediment to settle before moving or draining water.
A magnifying glass can also help identify tiny gold flakes that might otherwise be mistaken for dark sand or ordinary mineral grains.
Frequently Asked Questions
Can I clean gold nuggets with ordinary tap water?
Yes. Clean tap water is generally suitable for removing loose dirt and clay. Use a gentle flow and avoid washing fine gold directly into a drain.
Will soaking gold nuggets damage them?
Soaking solid gold nuggets in clean water is generally safe. It can soften dried clay and make cleaning easier. However, specimens containing other minerals may require additional care.
Can I use a toothbrush to clean gold nuggets?
A clean, soft toothbrush may be suitable for sturdy nuggets, but a softer artist’s brush is often better for small or delicate specimens. Avoid aggressive scrubbing.
How do I know if the sediment contains lost gold?
Inspect the settled material under good lighting and, if available, with a magnifying glass. You can carefully pan the retained sediment again to recover any remaining gold.
Should gold nuggets be polished after cleaning?
Not necessarily. Natural nuggets often have distinctive surfaces that collectors prefer to preserve. Polishing may remove natural features or reduce the appeal of a specimen.
Conclusion
Cleaning gold nuggets without losing fine particles is mainly a matter of patience, gentle handling, and effective recovery. Begin by inspecting the material, remove loose dirt carefully, soften stubborn clay with water, and use a soft brush only when necessary.
Most importantly, collect and inspect all rinse water and sediment before disposing of anything. By using a shallow pan, controlled water flow, and a dedicated recovery container, you can keep more of your recovered gold while preserving the natural appearance of your specimens.
Whether you are a beginner or an experienced prospector, careful cleaning practices help protect the results of your hard work and make every gold recovery session more productive.